
You bought the land with a vision, but overgrown brush, tangled underbrush, and crowded trees are standing between you and the property you actually want. Clearing it by hand would take weekends you don’t have, and traditional land clearing leaves ruts, stumps, and a mess you’d have to pay someone else to haul off.
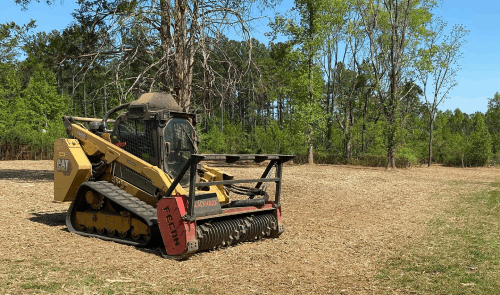
That’s where forestry mulching comes in. We bring a tracked machine with a mulching head onto your property and grind standing vegetation into a clean layer of mulch that stays right where it falls. No burn piles, no hauling, no torn-up topsoil. But the smoother the day goes, the better the result, and that comes down to how you prepare the site before we show up.
The seven steps below are what we walk every homeowner through before a job. None of it is hard, but doing it ahead of time means our operator pulls onto your property and gets straight to cutting instead of asking questions. That’s where the savings show up.
Step-By-Step: How To Prepare For Forestry Mulching
Getting ready for a mulching crew isn’t complicated, but it does matter. A little legwork on your end means we spend our time cutting instead of sorting out surprises. The seven steps below walk you through everything we want homeowners to handle before the machines roll in.
Step 1: Walk And Assess Your Land Before The Crew Arrives
Before anything else, take a slow walk across the area you want cleared. You’re looking for the lay of the land and anything that could slow a crew down or create a safety issue. Bring your phone and take pictures of anything that concerns you so you can share it with us later.
Pay attention to slope, wet spots, hidden stumps, large rocks, and old trash piles. Note where the property lines fall, especially if you share a border with a neighbor. The goal is to walk off with a clear mental map of what’s out there.
Step 2: Decide What Vegetation You Want To Keep
Not every tree or shrub needs to go. Most homeowners want certain hardwoods, specimen trees, or native plants left standing, and the only way we know is if you tell us. Walk the property with fresh eyes and make your decisions before we arrive.
Tie bright flagging tape or surveyor’s ribbon around anything you want saved. Use a color that stands out against the brush so our operator can see it from inside the cab. If you’re on the fence about a tree, flag it anyway, we can always cut it later.
Step 3: Mark Utilities, Structures, And Keep-Out Zones
This is the step that protects your property and our equipment. Call 811 a few days before the job so underground utilities get marked, and then mark anything above ground that we need to avoid. Septic lids, well heads, property pins, buried fencing, and irrigation lines all matter.
Flag sheds, outbuildings, fences, and any ornamental beds near the work zone. If there’s a drainfield, point it out in person when we arrive. The more you mark, the less we have to guess.
Step 4: Clear Removable Debris And Junk From The Area
Mulching heads are tough, but they don’t like metal. Old fencing, t-posts, barbed wire, tires, scrap metal, bottles, and dumped trash all need to come out before we start. These items can damage teeth, throw dangerous debris, and cost you money in repairs or delays.
Walk the site with a trash bag and a pair of gloves and pull out what you can. If there’s buried fencing or a junk pile too big to handle, let us know in advance so we can plan around it. A clean site is a fast site.

Step 5: Handle Permits And Property Rules
Depending on where you live, clearing vegetation may require a permit or a notification to the county. Wetlands, stream buffers, steep slopes, and protected species can all trigger rules you don’t want to find out about after the fact. HOAs sometimes have their own restrictions on clearing and tree removal.
Check with your county planning office and your HOA before scheduling. If you’re not sure what applies, ask us and we’ll point you in the right direction. Getting this squared away early keeps the project on track.
Step 6: Ask Your Forestry Mulching Contractor The Right Questions
Not every contractor who shows up with a skid steer is equipped to do the job well. Before you sign anything, make sure you understand who you’re hiring and how they work. A few good questions upfront save a lot of frustration later.
Ask about the following:
- Liability insurance and workers’ comp coverage
- Machine size and whether it fits your access
- How they price: hourly, per acre, or by the job
- Expected timeline and weather contingencies
- What happens if they hit something unexpected
Get the answers in writing when you can. A contractor who answers clearly and doesn’t dodge specifics is usually the one worth hiring.
Step 7: Choose The Right Time Of Year
Timing affects both the quality of the mulch and how easy it is to work your land. Fall and winter are our favorite seasons because the ground is firmer, leaves are down, visibility is better, and wildlife is less active. You also get a cleaner cut when sap is low.
Spring and summer work too, especially if you’re trying to knock back aggressive regrowth while plants are vulnerable. Wet seasons can create rutting on soft ground, so we may reschedule if conditions aren’t right. Tell us your goal and we’ll help you pick the window.
Ready To Prepare For Forestry Mulching? Let’s Talk
If your property is ready or you have questions about the steps above, reach out and we’ll take it from there. We’ll schedule a site visit, walk the land with you, and put together an estimate based on what we see. From there, you’ll know exactly what the job involves and what it costs before you commit to anything. Give us a call or send a message through the contact form to get started.